|
Using SmartSound in Liquid
By Fred Ginsburg
VideoEditSystems.com
Configuring SmartSound in your editing system
The first thing that we recommend is to use Windows Explorer to create a new
copy destination file for all of your SmartSound sound sound files,
except those that installed with Liquid. By default, SmartSound creates its copy
destination file on the C drive. This could slow down the application by being
on the same drive as Windows and Liquid.
More critical than that, though, is that should you ever have to re-install
your System Drive C software (and you will) – you want as much of your data as
possible safely parked on a different drive to prevent it from being erased when
you restore all of your system drive software from the RED DISK (or your
emergency restore disk).
For instance, let’s create a file named "SmartSound data" on our RAID (or
Media or other) drive.
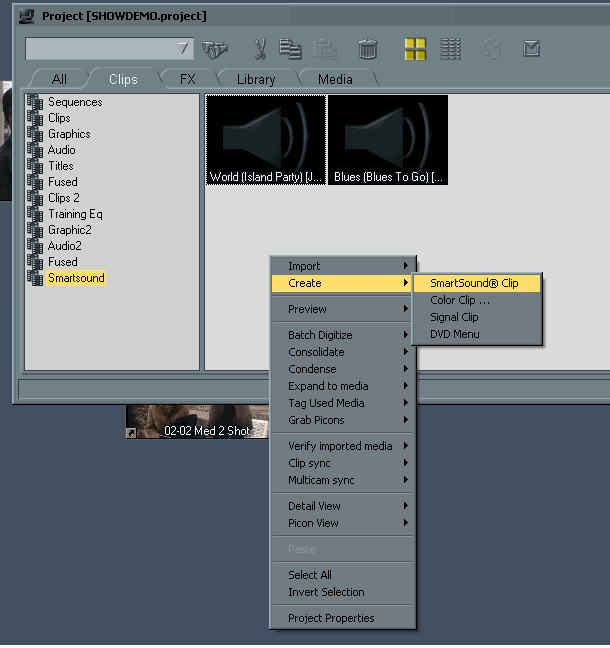
Now, go ahead and start the Liquid program. Open up a Project, and right
click in the Clips bin. Select Create > SmartSound Clip.
If you are using Liquid in the non-classic mode, you could open File > New
> SmartSound Clip. Personally, I find the right click in the bin method
faster, but that’s just me.
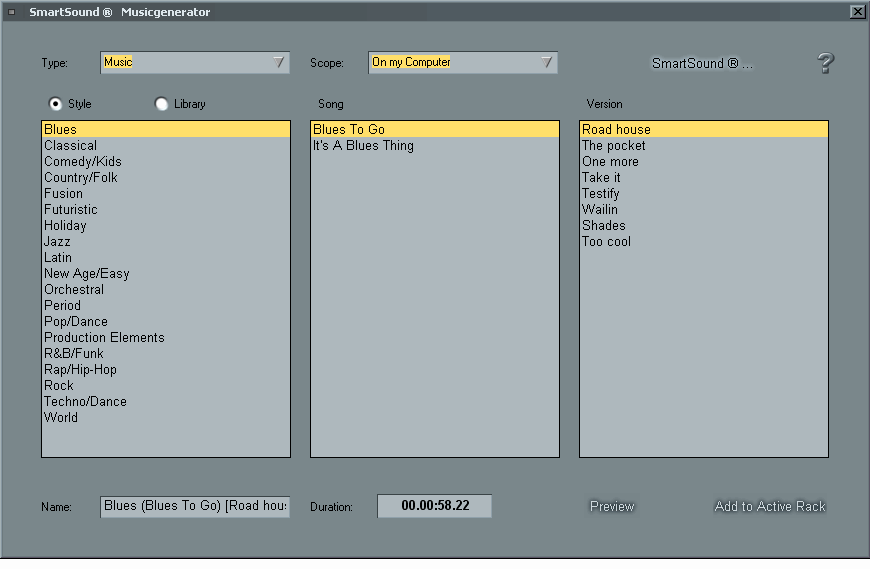
This will open up the SmartSound editor.
Clicking on the SmartSound logo/button , located to the left of the
big question mark, will open up the SmartSound Options window (the label bar
says Quicktracks).
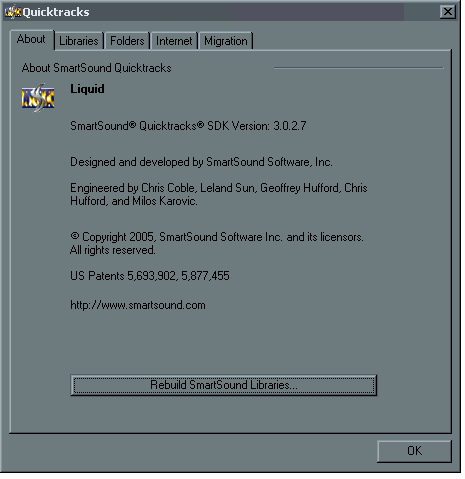
By the way, should you ever encounter problems with SmartSound having
difficulty linking to its library, just run the Rebuild utility shown on this
screen.
Author’s note: After I (experimentally) manually deleted and then restored my
Libraries and Sound Files folders from the main SmartSound folder on the C
drive, I had to use this Rebuild utility to bring everything back. Worked
perfectly!
For now, just go ahead and open the Folders tab.
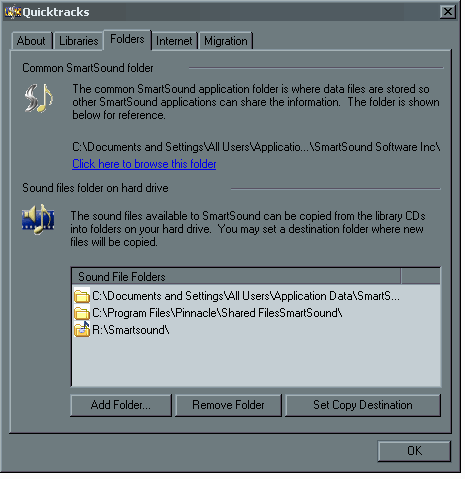
You will see the default location for your SmartSound files. We need to
change that location for any newly added materials to the new folder that you
created on the RAID drive (or the Media drive).
Easy to do… Just click on Add Folder and browse to the recently
created "SmartSound data" folder. After confirming it and returning to the menu,
highlight it and click on Set Copy Destination. Now, all of your future
SmartSound sound files will be stored in the new location.
The next step is to consolidate your older edition SmartSound files to the
new location. This would include older music from previous versions of
SmartSound. To do this, just open the Migration tab. The older Sound
Files will be MOVED to your new Copy Destination folder. Note that the Libraries
index folders will still be located on drive C, which we will eventually copy
for safekeeping.
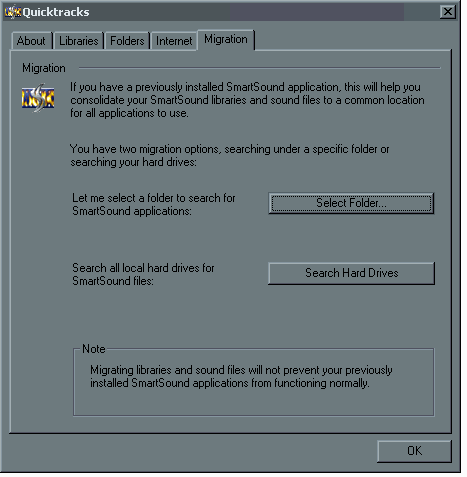
If you know exactly where all of your SmartSound files are located, you can
use the Select Folder button. Personally, I just use the Search Hard Drives
button and let SmartSound search for its own family. That way, I know that I did
not miss anything!
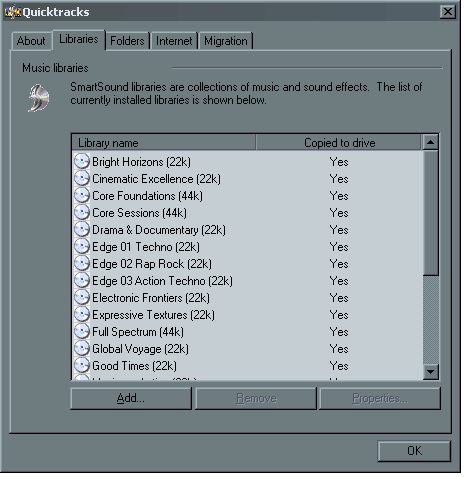
After SmartSound has rounded up all of its music, it will move them to your
new destination folder. Go to the Libraries tab and you will see the
results.
How to add new SmartSound CD’s to your program
From the SmartSound editor, Options Window (Quicktracks menu), or the
Libraries tab --just load your CD into your computer. You will be prompted to
Add the CD to your library. You will also be asked if you want to COPY your CD
onto your hard drive… of course you do! The new music will be added to your
collection and stored in the new destination folder that you created.
Backing up your Library
You can never have too many backups, but you can easily have one too few! I
like to back up my SmartSound collection because I prefer not to have to reload
my extensive anthology one disk at a time.
Make a copy of your new Copy Destinations folder and store it for safe
keeping.
You also need to make copies of the SmartSound data folders that are on Drive
C.
C:\Documents and Settings\All Users\Application Data\SmartSound Software Inc.
Just save the whole flock of them by clicking on the main SmartSound folder.
They are not very big, since the bulk of the sound files are residing in your
Copy Destination folder.
To restore, just paste your saved files back over the SmartSound Software
"tree" on Drive C. If needed, copy your Copy Destination folder back to your
system in the same place you had it originally. Use the Migration tab, and the
Rebuild utility. It’s fairly simple.
Using SmartSound in your timeline
Step one is to mark in and out points to determine the duration of the music.
Then right click in the Clip bin to bring up Create > SmartSound clip.
If you are using Liquid in the non-classic mode, you could open File > New >
SmartSound Clip.
This will open up the SmartSound editor.
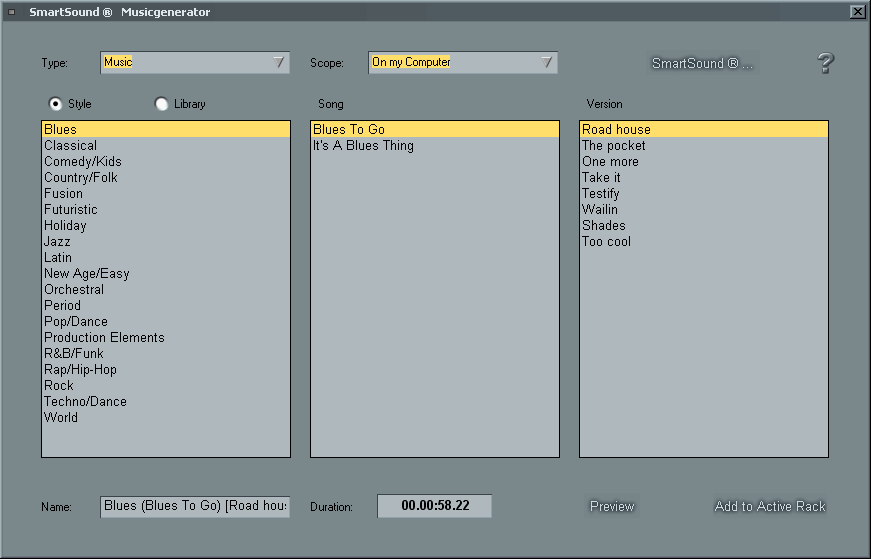
Browse through the music choices, and preview your selections until you find
what you like. You can stop a preview just by toggling the button again.
Clicking on Add to Rack will put the audio sample in the bin. Then you
can just drag it to the timeline.
Not happy with the selection? Right click the audio clip in the timeline and
open the SmartSound Editor. Choose another selection and it will replace the old
music.
Drag the trim handles of the music to lengthen or shorten the piece.
SmartSound will automatically re-compose for the new duration.
Another way to edit with SmartSound is to grab the "blank" SmartSound clip
from the Library tab in your rack and place it on the timeline. Drag the handles
to lengthen or shorten the clip. Right click the blank audio clip in the
timeline and open the SmartSound Editor. Choose another selection and it will
replace the blank selection.
After the music has been placed, use the Liquid audio editing tools to adjust
clip volume, create fades, ride gain using keyframes, and so on.
About the author: Fred Ginsburg C.A.S. Ph.D. MBKS is the boss of
VideoEditSystems.com, a division of Equipment Emporium Inc. (Fred’s other
company) and distributes the VES/Delta series video editing system, designed to
run Avid Liquid and Avid Media Composer. VideoEditSystems.com is proud to be a
reseller of SmartSound products.
|